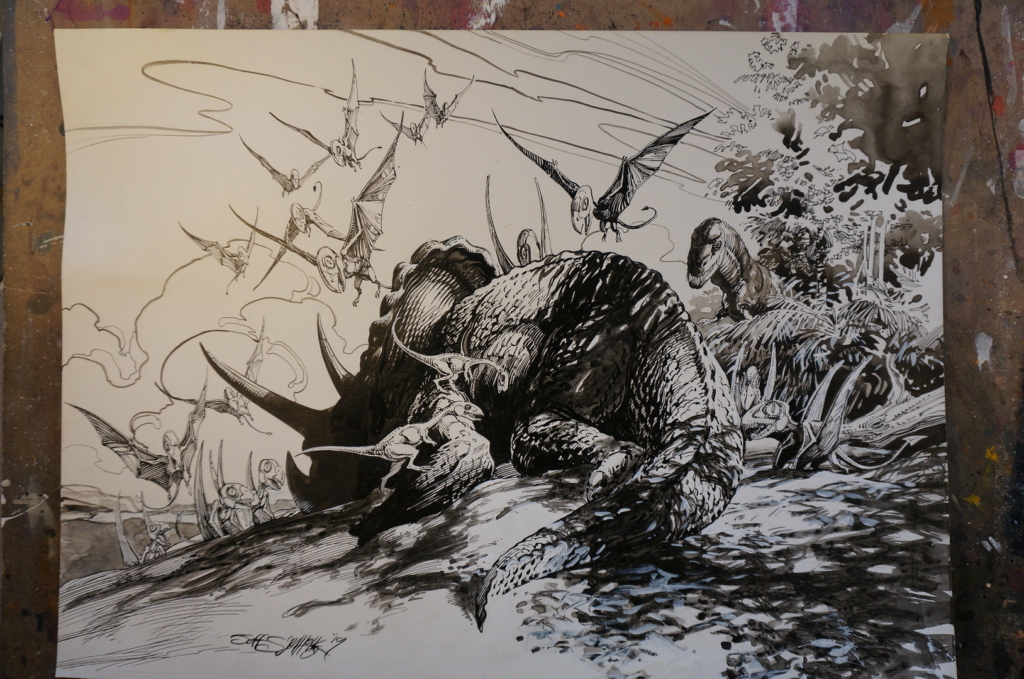
All Day Buffet of Triceratops Carcass
Introduction
This is the finished version of an pen and ink illustration of a dead Triceratops. What is seen here looks quite different from where it was originally going when I started inking. I am going to show you how to possibly fix something when it has gone terribly wrong and possibly keep from having to start all over again. Starting over can be quite an unpleasant task for any artist and sometimes it’s reason enough to not even try.

Initial pencil version of the dead Triceratops
The Pencil Image
This piece went off the rails quite fast because the pencils were not really clear in indicating distinct light and dark areas. More to the point, the lay of light was rather dull and I just wasn’t paying enough attention to what I was looking at. More time should have spent on this aspect and I should have given more consideration to what I really wanted to take place. What the light was supposed to be doing as it hit the dead triceratops should have been taken into consideration at the start. Instead I began to ink it up hoping to make it all work out on the fly. That didn’t happen.

The first inks on the piece.

More inks that get progressively worse.
The Inked Image
As you can see, the inking quickly went downhill. I found an overwhelmingly flat area that showed no interesting texture or flow of the eye. The more I worked on it the worse it got. I was just shoving ink around and that is always a mistake. It clearly looks as if no thought went into it. By the time I added the wash on the ground I knew this thing was a bust. I still liked the general idea but the thought of having to do it all over again really made me not want to do it at all. Soon I tossed it aside and moved on to something else. I told myself that maybe I will figure out what to do later on.

Area surrounded in red is where the gesso was applied.
The Corrected Image
I eventually figured out what I needed to do. I have been using gesso for quite some time now to cover areas that were not inked correctly or areas that I spilled something on. In most cases I put some tape around the area and then I use my pallet knife to spread the gesso over the mistake. On this piece I used some airbrush frisket to mask out what I didn’t want touched by the gesso. The knife blade leaves a pretty smooth surface to ink over.
The red outlined area is there I had cut it to fit. Since the area was big I had to do several swipes with the knife to cover the area. There were spots where each swipe meets the other and it left parts what weren’t entirely smooth. I decided it was okay because this was the ground and I could use it to my advantage as I put in the ink wash. The unintended texture would help in the end.

Round II of inking has begun.

Round II of inking continues.
The 2nd Round of Inking
Now what I have penciled back into place on the hardened gesso is more thought out than it was before. I have an idea of where shadows from the trees are going to fall and where light may be breaking out. I have made a clear choice on how the cast shadows are draping over the carcass of the Triceratops. Things are progressing much better in the second inking phase due to my gesso fix.

The finished piece showing how warped the illustration board is.
The End Result
The illustration board I am using was initially warped from some moisture. After the gesso was applied it was even more warped. As the gesso dried and tightened up it had an effect on the board. Despite of this problem, once it was scanned and put together in Photoshop the image was fine. The original art will look good once it is framed. I hate to waste materials so I keep old pieces like this around just to do a spur of the moment drawing of some sort. That is how this artwork came about on a whim. The take away lesson to all of this is to have an established game plan laid out at the start.
I used a brush for the washes and a pen with nib to apply the ink. Then I used a dash of white gouache here and there on the plants to show a play of light. I hope you can use these tips to salvage a mess up of your own.
To see more pen and ink artworks you can go to jeffslemons.com and comicartfans.com
Until the next dinosaur inking installment, be safe out there!